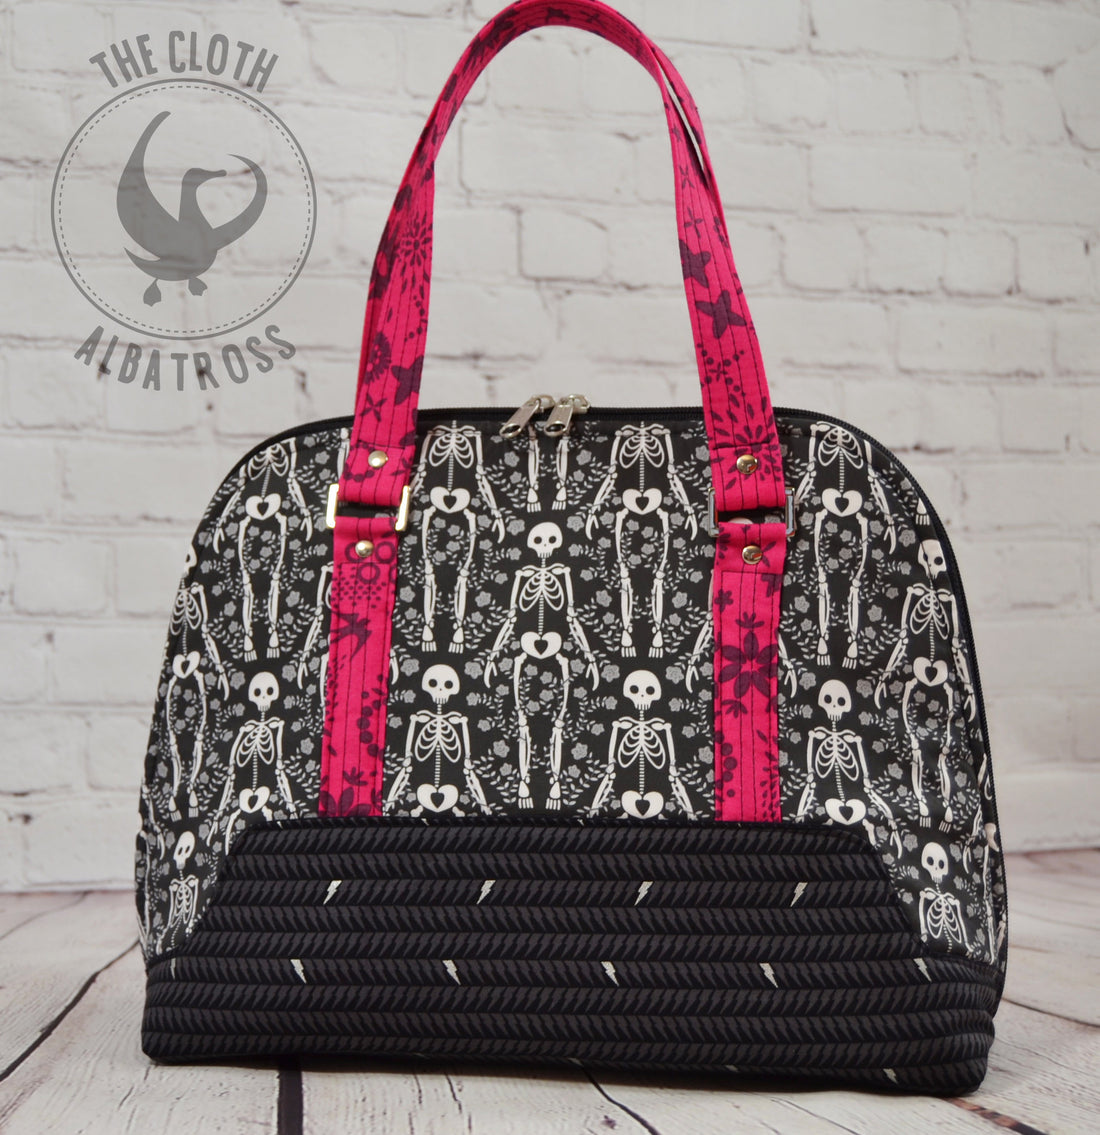
Boronia Bowler Handbag with Fabric Overlay
Share
This tutorial is meant to be supplementary to the Boronia Bowler handbag pattern. If you do not have the pattern yet, you can purchase it here.
If you would like to make a Boronia Bowler in all fabric, you will need to download this pattern piece, but you will not need to print page 24 of the original pattern. Page 24 is the original overlay; it's meant for vinyl, so there's no seam allowance added to that pattern piece.
After you've printed your pattern and taped your pieces together, you will cut all of your pieces as instructed by the pattern, except for the overlay. You will use the revised pattern piece for cutting your overlay pieces. (We'll get to that shortly.)
On page 2 of the pattern, under STRAPS, you'll also be cutting woven interfacing (SF101) for each of the strap connectors and straps.
Cutting the Overlay Pieces
I printed an extra copy of my bottom overlay piece so that I could just cut the pattern piece at the "fabric overlay line". If you do this, you'll have 2 pattern pieces.


Let's start with the fabric overlay pattern piece. You'll need to cut (2). I folded my fabric over so that I could cut them both at once. If you're using precious fabric for the base of your Boronia, you can use a solid that's a similar color for this because it won't show unless a bit peeks out over the top of the overlay after you've turned it. This will make more sense after you've looked a few steps further in the tutorial.

Pin your bottom overlay pattern piece to your exterior fabric and cut on the fold.*

*If you're using directional fabric, do NOT cut on the fold. Follow the next 2 steps to cut your exterior fabric for your overlay.
Skip to "Interfacing" if you're not using directional fabric.
For directional fabric, you will need to add a 3/8" seam allowance to the bottom of your pattern piece. Instead of cutting (1) exterior fabric on the fold, you will cut (2).


For directional fabric, place your (2) exterior fabric pieces right sides together (RST) and pin along the bottom straight edge. Sew together with a 3/8" SA.


Press the seam open.

Interfacing
In the pattern under INTERFACING, make sure to fuse interfacing to your strap connectors, straps, and overlay.*


*Even though it's not necessary, I like to mark the center of my fabric straps rather than press a center seam. I find that sometimes that center crease is annoying to get to go away. Also, I don't like to iron.
Prepping the Overlay
You should have a 3 pieces for your fabric overlay - an interfaced bottom overlay, and (2) fabric overlay piece.

Pin the fabric overlay pieces RST with the bottom overlay. Pin from the interfaced side because we want to sew from the interfaced side of the fabric. That side is thicker and the feed dogs will feed the thinner fabric evenly with the top layer. It's not imperative, but your fabric could shift otherwise.

After my fabrics were pinned together, I marked a 1/4" seam allowance (SA) around the curves. I did this because I think it's difficult to keep a really even SA around curves without a line. We want to make sure we sew an accurate line, as it will be the edge of our overlay and we want it to look nice.

Sew the pinned edges together at 1/4" SA. Make sure to shorten your stitch length to approximately 2 mm. (A shorter stitch length will make it easier to get nice curves.)

Now we need to slip and notch our curves. Clip the concave (in like a cave) curves by clipping right up to the stitching but taking care not to clip your stitches. Notch the convex curves by cutting little triangles out. Trim the rest of the SA to 1/8".

Before turning our overlays, it's easier to get a crisp edge if you press the seams open first.

Turn your overlay. Use a dull stick (I use a metal chopstick) to push the curves out.

Press your overlay.

Focal Fabric Pattern Guide (Optional)
If you're using a focal fabric, you might find it helpful to mark up your BODY A pattern piece so that you know where the overlay and straps will hit on your fabric. If this is not a concern, move onto the next step.
Mark 1/2" up from the bottom edges of your BODY A pattern piece. Align your bottom overlay at these 1/2" marks. Trace around the edge of the overlay onto the BODY A pattern piece.

In addition to marking the overlay positioning on the BODY A pattern piece, I also marked where the straps will go. I like having these measurements handy on my pattern piece, but it also allows me to see where I want to position my fabric.
The finished straps are 1" W x 5 1/2" H. They're placed 1 5/8" up from the bottom edge and are 5" apart (2.5" from center on each side).

Cutting Foam Piece
In the vinyl version of Boronia, the straps are not sewn through the foam, as the layers would be too thick for many home machines. Since we're using fabric, we can sew the straps through the foam, but will need to pin our bottom overlay in place on the body even though we're not ready to sew it down yet. We need to do this to use it as a pattern piece for cutting our foam.
Mark 1/2" up from the bottom edge of your Body A. Pin your Bottom Overlay to your Body A fabric at the 1/2" mark. (We're NOT sewing the bottom overlay yet.)

You should now have one large piece. Use this as a pattern piece to cut your foam.

After your foam is cut, remove the Bottom Overlay from the foam and the Body A. The body can remain pinned to your foam. Baste the body to the foam.

Peltex Base
Get your Peltex and your Bottom Overlay. Mark the vertical and horizontal centers of both your Peltex and Overlay. Center the Peltex on the wrong side of your Bottom Overlay.

You'll notice that I drew a box an 1/8" in from all sides of my Peltex. I like to make sure my stitching is really straight here so that it looks nice on the bottom of my bag.* This line is not necessary. I just find it difficult to follow a straight seam when I have white on white.
*You might be tempted to skip sewing down the Peltex since you could easily just fuse it. I would highly recommend stitching it down because it gives the bottom of the bag nice definition.
Use your pattern piece to mark purse feet placement on your Peltex. (Try to ignore my hacked up pattern piece.)

Install your purse feet.

Set your overlay aside for now.
Strap Connectors
If you didn't mark a center line on your strap connectors after you interfaced them, do so now. Or just press a crease in the vertical center of each connector. Press your fabric to the center line or center crease. I like to lay my ruler on top of my connectors while they're still hot so that they lay flat when they cool.

After you've pressed your connector straps, topstitch a scant 3/8" in from each side. (There will be approximately 1/4" in between each line of topstitching.This may sound confusing but if you look at page 3 of the pattern, it will make sense. The difference is that the measurements in the pattern are taken from the back center seam. Feel free to use those if you're more comfortable with that! I just wanted to sew from the front.
After your connectors are sewn, mark a line 5.5" up from the short end on each connector. We will fold and press the connector at that line. There should be a 2" overlap - this will ensure your straps are really secure on your bag.
When I do my strap connectors, I like to fold in the edges of the top portion that gets sewn behind the strap so that the edges don't peak out the sides. (It kind of looks like a paper airplane tip.)

After your straps are pressed, we need to mark connector placement on the Body A. The straps are placed 1 5/8" up from the bottom edge and are 2.5" from the center line (the connectors are 5" apart). (These measurements are on page 4 of the pattern.)
You can either pin or hold the strap connectors in place with fabric glue before you stitch them down.

Before I stitch my connectors down, I like to mark a straight line across the top so that I have a better guide for my stitching. I marked a 1/4" down from the hardware and 1/2" down from the hardware. The 1/4" line is a guide for where to place my rivets and the 1/2" line is a guide for my stitching. If you're using rivets, mark these 2 lines. If you're not using rivets, only mark 1/4" down from the hardware and stitch across at that line.
Topstitch 1/8" in from the edges of all (4) strap connectors. Sew a straight line across where you marked.

If you're not using rivets, skip to "Bottom Overlay".
If you're using rivets, you'll need (4) scraps of Peltex ~1" square. (My pieces are by no means square.) Punch a hole in the center of your (4) Peltex scraps.
You'll also need to punch a hole centered and 1/4" down from your hardware. Treat the fabric with Fray Check or other seam sealant.

Set your rivets.

Bottom Overlay
Whoohoo. We're to my favorite part. I like placing the overlay on top of the body because then the look of the bag really starts to come together.
Get your overlay and place it on top of your body piece. Match up all of the edges and pin it down.

Topstitch along the edges of the overlay and baste stitch the sides to the foam.

This seemed like a lot of work but most of the exterior is done! You can find your place in the pattern on page 6 "Interior Assembly". Make sure you've also been looking through the pattern as we go as it's more in depth on actual bag construction. I hope this tutorial has been helpful for making your fabric Boronia.

4 comments
viagra france acheter en bordeaux Hahchied https://asocialiser.com/ – cheapest cialis online seerseCoof Worldwide Real Acticin 30gm From Canada AllettallRom Cialis Uncole Olanzapine
vendita viagra generico in europa Hahchied https://ascialis.com/ – Cialis seerseCoof Propecia Genuine AllettallRom Cialis Uncole Viagra Soft Pills
I got all of that done without a problem it is the lining that I am having a problem with. Willl there be a tutorial?
Hola vivo en otro país en la Argentina y me encantan sus patrones como este el boronia como puedo obtenerlos espero su respuesta gracias